Installation
This guide walks you through setting up a CoderFlow server. Before exposing the server to a network you do not fully trust, review Security & Hardening.
Prerequisites
A Linux server with the following installed:
- Docker — Install Docker Engine
- Git — Available via your distribution's package manager
Optionally, if you'd like the server to listen on a port below 1024 (such as 443 or 80):
- On Ubuntu and Debian-based distros - Install authbind via APT package manager.
- Other distros - See your distro's documentation for enabling non-root users to bind network services to privileged ports
Root Permissions
Only a few parts of the installation process require root permissions.
Do not use root permissions (i.e. sudo or su) except where specifically instructed.
The server installs and runs as a non-root user.
Create a Dedicated Linux User For Each Installation
Each installation of CoderFlow server should run under a unique and dedicated user account, rather than your personal account or root. This provides better security isolation and makes it easier to manage the service.
Create a dedicated user (we suggest coder, but any name works):
# Create the user with a home directory
sudo useradd -m -s /bin/bash coder

# Set a password (optional, if you need interactive login)
sudo passwd coder

# Add the user to the docker group so it can manage containers
sudo usermod -aG docker coder
If coder conflicts with an existing user on your system, choose a different name — the server works the same regardless of the username.
Optional: If Using Server Listen Port Below 1024
If you'd like to use a server listen port below 1024 (e.g. 443), configure authbind to allow the dedicated CoderFlow user to use the port:
For example, for port 443:
sudo touch /etc/authbind/byport/443
sudo chown coder /etc/authbind/byport/443
sudo chmod 500 /etc/authbind/byport/443
Switch to Dedicated CoderFlow User
Switch to the dedicated user before proceeding with installation:
sudo su - coder
Install Node.js via NVS
Use the installation guide to install Node Version Switcher (NVS) in the dedicated user's home directory. This allows each CoderFlow installation/user to use a separate version of Node.js. If you prefer, you can use nvm instead, but NVS will be used in this documentation.
After installing NVS, exit and restart your shell and then install Node 24:
nvs add node/24
nvs use node/24
nvs link node/24
Setup
Install the Server
npm install -g @profoundlogic/coderflow-server
Create a Setup Repository
The setup repository contains your environments, task templates, and configuration.
If your organization already has a setup repository, clone it:
git clone https://github.com/your-org/mycompany-coder-setup.git
Otherwise, create a new one:
coder-server init mycompany-coder-setup
This creates a mycompany-coder-setup directory with the required structure and initializes it as a git repository.
Then configure the server to locate the setup directory using a command like this, specifying the path to the setup directory:
coder-server config set coder_setup_path mycompany-coder-setup
Install License
coder-server license set <your-license-key>
Attaching Data to a Seat
Each running CoderFlow server uses one seat of your floating license while it is active. By default, CoderFlow records its own version against the seat, so support can see which version a server is running. This value appears in the User Data column of the Seat Usage view.
You can attach your own label to a seat — for example, to identify which server or environment it belongs to. Set the CODERFLOW_FLOATING_USER_DATA environment variable before starting the server:
CODERFLOW_FLOATING_USER_DATA="Frankfurt production" coder-server start
Your label is placed first and the CoderFlow version is appended after it. The combined value is limited to 50 characters, so a long label may push the version off the end. The label is purely informational — it has no effect on licensing — and is shown in the Seat Usage view and in the output of coder-server license seats.
Set this variable the same way you set other server environment variables (for example, in a systemd unit, a PM2 ecosystem file, or the CoderFlow user's login profile) so that it is present every time the server starts.
Seat Retention on Shutdown
By default, CoderFlow keeps its seat when the server stops. A persistent server starts and stops routinely, and keeping the seat means it can always start back up — including when the licensing server is temporarily unreachable, because the server also keeps its last signed license locally and starts from that within the grace period. A server that is stopped for good has its seat reclaimed automatically once its license pulse expires, so seats are not held forever.
This differs from products designed to run in short-lived containers, which release their seat on every shutdown. If you run multiple CoderFlow servers from one floating license and want a stopped server to release its seat immediately instead of waiting for the pulse to expire, set CODERFLOW_FREE_SEAT_OSD:
CODERFLOW_FREE_SEAT_OSD=true coder-server start
With this set, a clean shutdown releases the seat right away. Leave it unset (the default) for the persistent-server behavior. The trade-off: retaining seats favors always being able to restart, at the cost of a stopped server continuing to hold its seat until its pulse expires.
Licensing-Server Outages
CoderFlow is built to keep running — and to start — even when it can't reach the licensing server. Each running server holds a short-lived, cryptographically signed "pulse" that it refreshes on a heartbeat; if the licensing server is unreachable, returns an error, or can't confirm the seat, the server keeps running on its last valid pulse until that grace window expires. It does not stop or fail to start just because a heartbeat didn't get a clean answer.
The only thing that stops a licensed server within its grace window is an explicit, signed revocation from the licensing server (for example, a license cancelled for non-payment) — or the license's own term expiring. A misconfigured, incomplete, or impostor licensing server cannot take your servers down: without a valid signed revocation, an error or "not found" response is always treated as a temporary outage, not a revocation.
Create Admin User
coder-server create-user --username=admin --email=admin@example.com --name="Admin User" --admin
You'll be prompted to set a password.
On a brand-new install, the first created account is automatically granted Server Admin even without --admin (this policy is enforced in the shared user service, so it applies across CLI/API/OIDC auto-provisioning paths).
Optional: Configure Server Listen Port, TLS, and HTTP/2
By default the server listens on port 3000. To configure an alternate port (e.g. 443):
coder-server config set server_port 443
To configure a certificate for TLS:
Certificate and key files must be in PEM format.
The certificate file must contain the server certificate followed by any intermediate certificates, in that order. Including the root certificate is optional. With Let's Encrypt and most public CAs, use fullchain.pem.
File paths can be given as absolute or relative.
Files must be readable by the dedicated CoderFlow user.
coder-server config set ssl_cert_path mycert.pem
coder-server config set ssl_key_path mykey.pem
A CA certificate bundle (PEM format) can also be configured if your setup requires one:
coder-server config set ssl_ca_path myca.pem
Run coder-server config show to see all configuration keys and their current values.
HTTP Protocol Selection
CoderFlow's default http_protocol setting is auto:
- With both
ssl_cert_pathandssl_key_pathconfigured, CoderFlow automatically serves normal browser traffic over HTTP/2. Clients that do not support HTTP/2 fall back to HTTPS/1.1 on the same port, and terminal, code-server, and task-application WebSockets continue to use the HTTP/1.1 Upgrade mechanism on that port. - Without TLS, CoderFlow keeps its existing cleartext HTTP/1.1 listener. This is also the normal private-backend configuration when a reverse proxy owns the public certificate.
- If only the certificate or only the key is configured, startup fails with an actionable error instead of silently choosing another protocol.
No Nginx, load balancer, or other customer-managed process is required for the built-in HTTP/2 path. You can persist a mode explicitly when you need to control a rollout:
# Default: HTTP/2 when TLS is complete; HTTP/1.1 otherwise
coder-server config set http_protocol auto

# Force HTTP/1.1, including on a direct-TLS installation
coder-server config set http_protocol http1

# Require HTTP/2 mode; startup fails unless TLS is configured
coder-server config set http_protocol http2
Restart CoderFlow after changing the protocol setting. Removing the setting restores auto:
coder-server config remove http_protocol
coder-server restart
An existing direct-HTTPS installation with no http_protocol override begins offering HTTP/2
after upgrading to a version with built-in HTTP/2 support. To stage that transport change
separately, set http_protocol to http1 before restarting the upgraded server, then return it to
auto when ready.
When a reverse proxy terminates TLS, do not also configure CoderFlow's certificate and key on the
private backend. Leave the backend on auto (which resolves to HTTP/1.1 without TLS) or explicitly
set http_protocol to http1. Continue to configure trusted proxy headers as described below.
Verify the Active Protocol
A successful built-in HTTP/2 startup reports the resolved mode, its ALPN protocols, and the WebSocket fallback in the server log:
httpProtocol="HTTP/2 with HTTP/1.1 fallback"
alpn=["h2","http/1.1"]
webSockets="HTTP/1.1 Upgrade on the same TLS port"
coder-server status also reports HTTP/2 + HTTP/1.1 fallback. From another machine, use a curl
build with HTTP/2 support to verify what the public endpoint negotiates:
curl --http2 --silent --show-error --output /dev/null \
  --write-out 'HTTP %{http_version}, status %{http_code}\n' \
  https://coderflow.example.com/health
The expected result is HTTP 2, status 200. You can also open the browser developer tools Network
panel and add the Protocol column; the main document and ordinary page resources should report
h2. WebSocket requests reporting HTTP/1.1 are expected.
If a TLS endpoint unexpectedly reports HTTP/1.1, check coder-server config show, confirm that both
TLS paths are configured and readable, and inspect the startup diagnostics. When a reverse proxy is
in front, verify HTTP/2 at the public proxy endpoint; the private CoderFlow hop should remain
HTTP/1.1.
Set the Public URL
When TLS is enabled, also set the server's public base URL. Include the port unless the server listens on the default HTTPS port (443) — for example, with the default listen port of 3000:
coder-server config set site_url https://coderflow.example.com:3000
Task containers call back into the server — to fetch Git credentials for cloning and to use the
API — using a URL the server hands them at launch. Tasks started from the web UI use the URL from
your browser's address bar, but background tasks (schedules, webhooks, chat triggers) use site_url
or, when it is unset, a callback URL the server recorded from the first admin request it saw — a
value that is written once and never updated automatically. On an installation that previously ran
without TLS, that recorded URL is a plain http:// address, which stops working the moment the
server switches to HTTPS — background tasks then fail to clone repositories or reach the API, with
no obvious error. Setting site_url avoids this.
Note that the callback URL is injected into each task container when it is created. Task containers that already existed before a protocol or hostname change keep their old URL, so those tasks must be relaunched after the change.
site_url is also used to generate password-setup and login links, so it is worth setting on any
installation reached via a hostname rather than an IP address.
If task containers need to reach the server at a different URL than the public one (for example an
internal address), set the CODERFLOW_INTERNAL_URL environment variable for the server process —
it takes precedence over site_url.
The server logs a warning at startup if TLS is enabled but background task containers would be handed a plain-HTTP callback URL.
Optional: One-Time Login Links
One-time login links are disabled by default. To allow administrators to generate them (for example
with the create-login-link command):
coder-server config set login_links_enabled true
The generated links use site_url as their base, so set it first.
Certificate Renewal
Certificate files are read once, at startup. The server does not watch them for changes, so after a certificate is renewed the server must be restarted to load the new files. Plan for this with any ACME automation — for example, a certbot deploy hook:
#!/bin/sh
# /etc/letsencrypt/renewal-hooks/deploy/coderflow.sh
# Copy the renewed files somewhere the dedicated user (here: coder) can read
# them (Let's Encrypt keeps its live directory root-only), then restart.
install -d -o coder -g coder -m 750 /home/coder/certs
install -o coder -g coder -m 640 \
  /etc/letsencrypt/live/coderflow.example.com/fullchain.pem \
  /etc/letsencrypt/live/coderflow.example.com/privkey.pem \
  /home/coder/certs/
su - coder -c "coder-server restart"
Adjust the paths and user name to your installation, and point ssl_cert_path and ssl_key_path
at the copied files. su - coder starts a login shell, so settings persisted in the dedicated
user's profile — such as NODE_ENV=production and the NVS/nvm Node.js setup — are applied to the
restarted server. If you manage the process with PM2, replace the restart line with
su - coder -c "pm2 restart coderflow --update-env".
Optional: Configure Trusted Proxy Headers
If CoderFlow runs behind nginx, Apache, Cloudflare, or another reverse proxy, enable trusted proxy handling before configuring HTTPS-only integrations such as OAuth providers:
coder-server config set trust_proxy true
The same setting is available as an environment variable, which takes precedence over the configuration key when both are set:
TRUST_PROXY=true coder-server start
You can also enable Trust Proxy later from Server Settings -> General Settings and restart the server. This lets CoderFlow read forwarded protocol, host, and client IP headers correctly. See Server Operations & Monitoring for operational notes.
Your proxy must send the standard X-Forwarded-Proto, X-Forwarded-Host, and X-Forwarded-For
headers. If X-Forwarded-Proto is missing, CoderFlow sees plain-HTTP requests and will generate
http:// URLs — including the callback URLs handed to task containers — even though users reach
the proxy over HTTPS.
Optional: Configure Server Log Retention
CoderFlow keeps recent server output in an in-memory buffer and also writes it to daily files under
server-logs/ in the server data directory. The persisted history is what lets the Logs tab in
Server Administration query further back than the buffer holds, and it survives a server restart.
History is kept for 14 days by default. Set SERVER_LOG_RETENTION_DAYS before starting the
server to change the window, or set it to 0 to disable persistence entirely and keep logs in
memory only:
SERVER_LOG_RETENTION_DAYS=30 coder-server start
Files older than the retention window are deleted when the server starts and when logging rolls over to a new day. Set this variable the same way you set other server environment variables, so it is present every time the server starts.
See Server Operations & Monitoring for how the Logs tab queries this history.
Start the Server
For production installations, set NODE_ENV=production. Persist it in the dedicated user's shell
profile so that every way the server gets started — daemon mode, coder-server restart, PM2, and
deploy hooks — inherits it:
echo 'export NODE_ENV=production' >> ~/.profile
source ~/.profile
Then start the server:
coder-server start
NODE_ENV=production is reflected in the environment field of the startup log line (which
otherwise reports development) and enables production safeguards — for example, the server
refuses to start if authentication has been disabled via DISABLE_AUTH.
If using a listen port below 1024 (e.g. 443, 80) and using authbind to allow that, the server must be started like this instead:
authbind --deep coder-server start
Once running, log in to the Web UI (default port 3000) with the admin user you created.
Set Up Git Providers
To allow CoderFlow access to your Git hosting service (e.g., GitHub), follow the instructions in Git Providers.
Configure Your Environment
The coder-server init command created a default environment with placeholder values. Configure it through the Web UI:
- Navigate to Environments in the Web UI
- Click on the default environment, if it isn't already selected
- Update each section:
Repos
Click Add Repository to add your GitHub repository:
- Git Provider: Choose a Git provider from the list
- URL: URL (e.g.,
https://github.com/acme/my-project.git) - Branch: Default branch (e.g.,
main)
Build Docker Images
Docker images must be built before you can run tasks. There are two ways to build images: through the Web UI or using the CLI.
Build Base Image
Build the base image that all environments inherit from.
Web UI:
- Navigate to Settings → Environments
- Select your environment, if it's not already selected
- Click Actions → Build Base Image
- Optionally check "Build without cache" for a clean rebuild
- Click Build
CLI:
coder-server build base
The base image bakes in the numeric UID/GID of the dedicated user you created above, so coder-server build base builds the image directly only when it runs as that user — which is the case if you followed Switch to Dedicated CoderFlow User.
Run as any other account (including root), the command instead asks the running server to build, which requires an authenticated session (coder login, or CODER_API_KEY). If you need to trigger a build from a root shell or a provisioning script, switch to the dedicated user with its own environment first:
sudo -iu coder coder-server build base
# or
runuser -l coder -c 'coder-server build base'
Use a login shell (-i / -l) so HOME belongs to the dedicated user; otherwise the command cannot tell which account the server runs as and will fall back to asking the server. The same applies before the server's first start, since the account is identified from the server's data directory — start the server first, as this guide does above.
Build Environment Image
Build your environment's Docker image.
Web UI:
- Navigate to Settings → Environments
- Select your environment, if it's not already selected
- Go to the Build tab
- Click Build Now
CLI:
coder-server build default
Rebuild after making changes to the Dockerfile or setup.sh.
Set Up LLM Access
Before running tasks, configure access to AI providers. Authentication can be performed by both OAuth and API keys.
To authenticate task execution using your subscription accounts (OAuth), follow the instructions in AI Provider Authentication.
Authentication using AI keys can be used for task execution as well as auto-generating task names. To authenticate using AI keys, do the following:
- Navigate to Settings → Server Settings → API Keys in the Web UI
- For each provider, enter the corresponding API key (the default agent's API key will be used when auto-generating task names)
- To execute tasks for a provider using API keys, switch its toggle on
Supported providers:
- Claude (Anthropic)
- Codex (OpenAI)
- Gemini (Google)
- Bob (IBM)
- Grok (xAI)
- Kimi (Moonshot AI)
Verify Installation
First, open Administration → Server Administration → Health to check that host metrics load. See Server Operations & Monitoring for details.
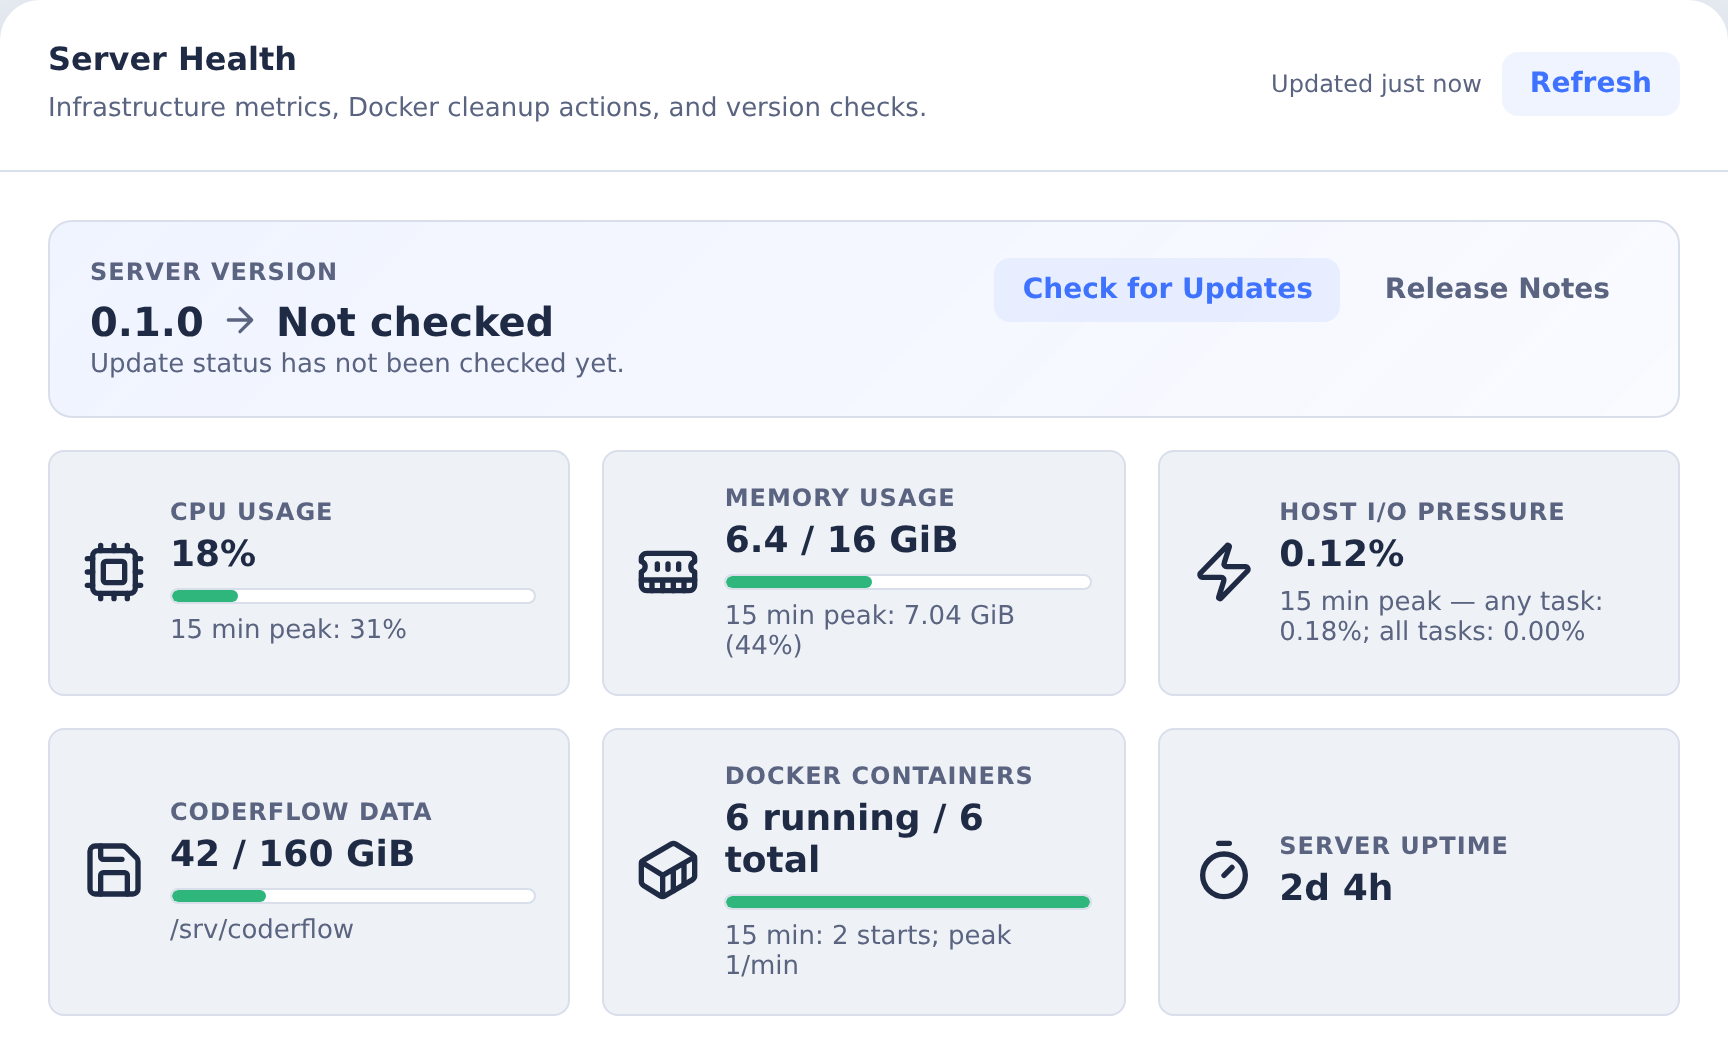
Then submit a task to check the execution workflow:
- Open the Web UI in your browser
- Select your environment and enter a simple task (e.g., "List the files in the repository")
- Submit and watch the task run
If the task completes successfully, your installation is working.
Server Management
Running as a Daemon
Use the --daemon flag to run the server in the background:
coder-server start --daemon
Manage the daemon with:
# View logs
coder-server logs

# Stop server
coder-server stop

# Restart
coder-server restart

# Check health
curl http://your-server:3000/health
Using PM2
As an alternative to the built-in daemon mode, you can use PM2 for process management.
PM2 provides additional features like automatic restarts on crash and system boot persistence.
Install PM2 Globally
npm install -g pm2
Start CoderFlow with PM2
If using a listen port below 1024 (e.g. 443, 80) and using authbind to allow that, the server must be started like this:
pm2 start --name coderflow authbind -- --deep coder-server start
Otherwise start like this:
pm2 start --name coderflow coder-server -- start
View Logs
pm2 logs coderflow
Stop/Restart
pm2 stop coderflow
pm2 start coderflow
pm2 restart coderflow
Auto-start On System Boot
Save the PM2 process list to disk:
pm2 save
Generate a PM2 startup script:
pm2 startup
pm2 startup outputs a commmand string to your terminal, which must be run as root, to configure the system's service manager to start up PM2 at system boot.